The Mono Editor is designed to provide users with an intuitive user experience. Even so, users switching from the V3 Editor to our most current version, II or the improved interface, will experience considerable changes in user experience. In this article, we have compiled a list of changes that can impact your workflow.
Here we will cover:
Overview of the editors:
The II editor:

Here in II, users have access to a cleaner interface, yet with increased functionality.
In the top menu panel, you can see Design, Content, Products, a page dropdown, viewports (for desktop, tablet and mobile), an undo button, settings, Preview and Publish.
Design is where the editing takes place.
Content is where you can add, update and upload content, including global data, files to the file manager, add 301 redirects and identify SEO gaps.
Products is where you can find additional Mono Products included on the website’s subscription; including Mono Blog, Mono Cookie Consent, Mono Customers Mono Ecommerce+, Mono On-Site Engagements and Mono Scheduling.
The page dropdown makes it easy for editors to quickly switch from editing one page to the next.
Viewports allow editors to see how the website appears on desktop, tablet, and mobile devices.
The Undo Button gives a brief description of past actions, with the most recent at the top. A scroll bar appears if the user wants to go further back than the four most recent changes.
Settings is where general website settings can be updated.
Preview allows you to preview the updated site in all three viewports at the same time prior to publish.
Publish is where you can publish your new/updated site.
On the left-hand side, similar to in V3, users have access to both Pages and Help. Yet here these sections are indicated by a sole icon, rather than showing the entire list of pages and guides, providing a less-cluttered editing experience, while also giving room to Design in the menu panel.
In Pages, users can add, duplicate, hide, and delete pages, as well as manage other page settings.
In Help, you have direct access to keyboard shortcuts and the Mono Help Center.
By clicking the Design icon, users have easy access to global design elements such as global fonts and colors, and more.
Find more information here:
The V3 editor:

In V3, the user experience is more cluttered with menus on the left-hand side and on the top. While the menus could be closed and re-opened with the menu arrows, the overall experience is more overwhelming – despite having far less functionality and editing options.
Terms to know: Rows, columns, and modules
There is an important change to the setup and terminology in II compared to V3. Modules in V3 do not distinguish between individual content blocks (modules in II), columns, or rows.
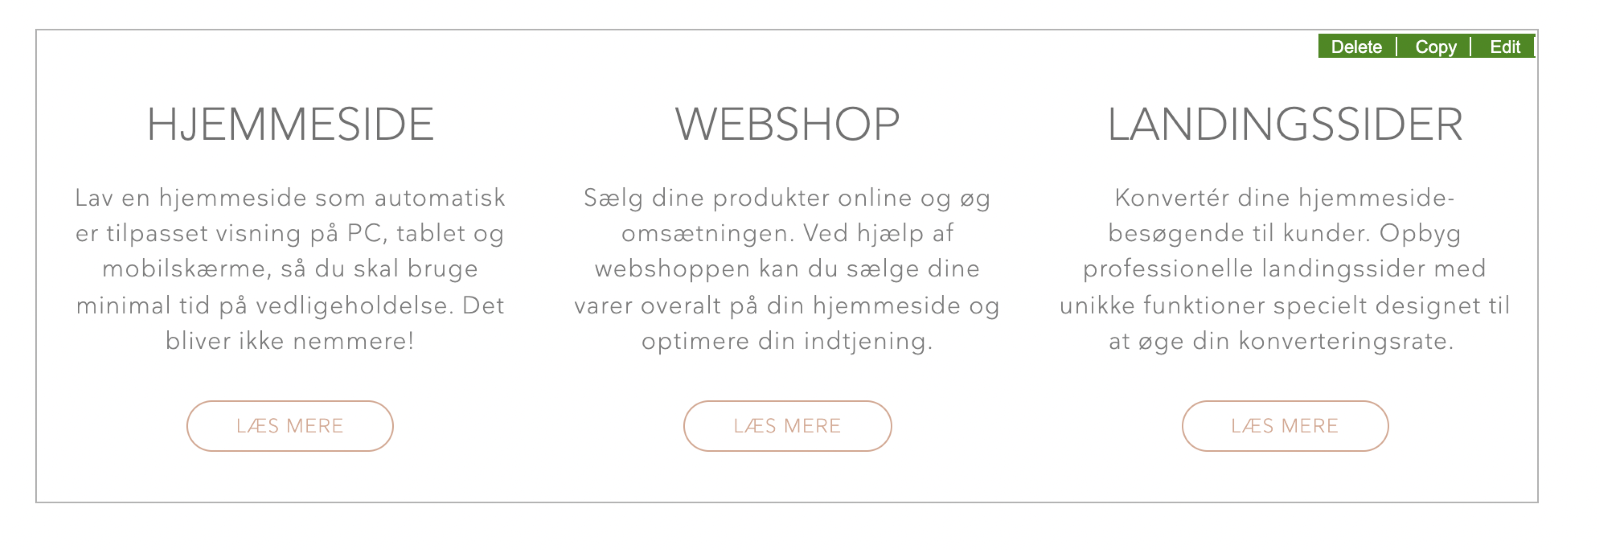
Let us use this module – in V3 terminology – here as an example:
The module is split into 3 sections, or columns, with each including a headline, text, and button.

The menu that appears includes the options: Delete, copy, and edit. If deleted, it would delete everything within the grey outline.
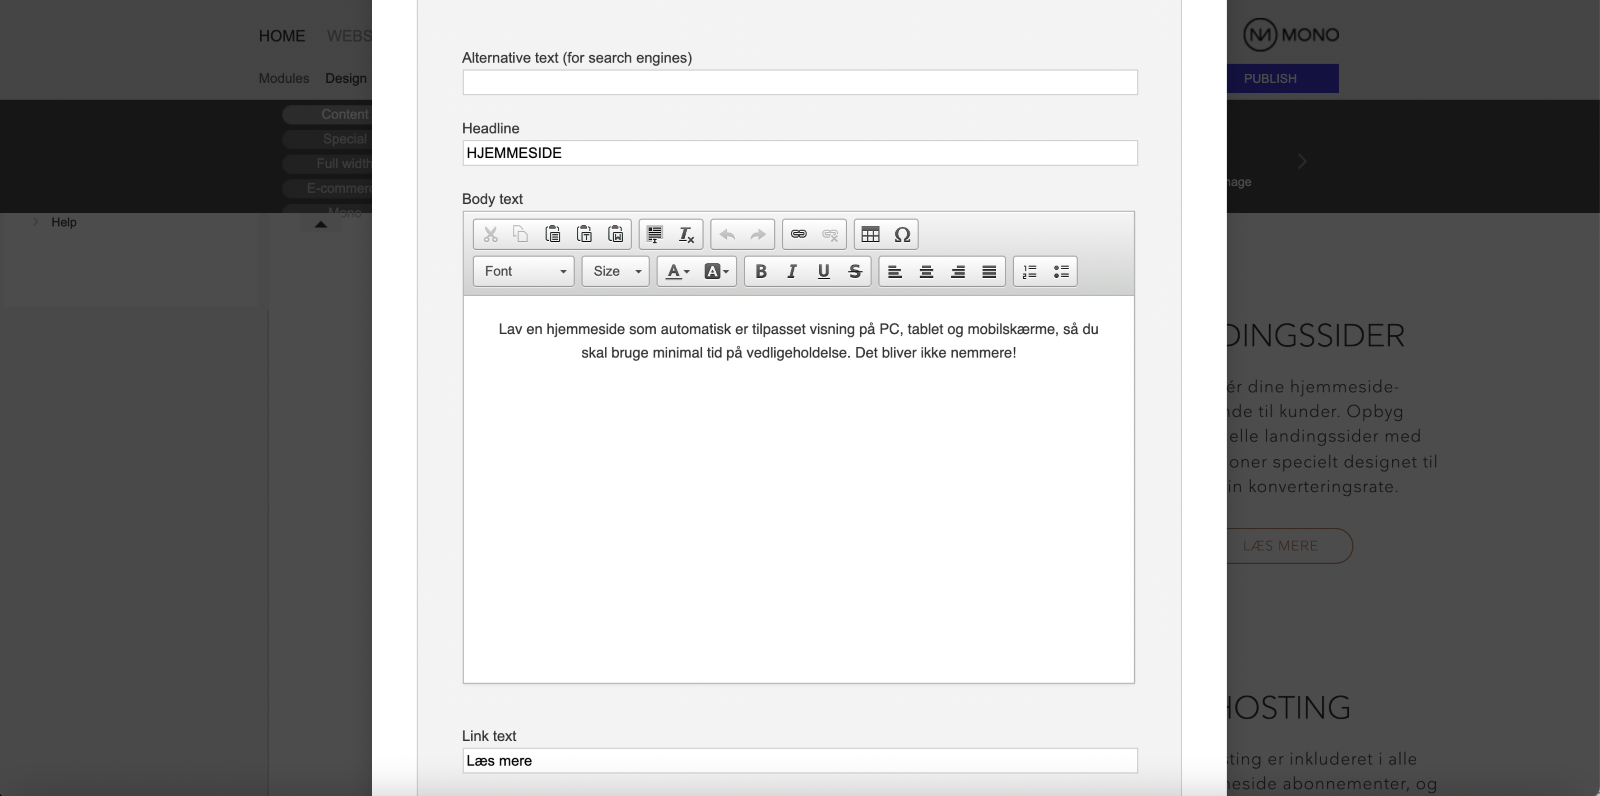
If Edit is selected, a pop up appears where the headline, body text, and link text (along with other features) can be edited for each section. The user scrolls down the menu to get to the middle and right-hand sections.
In II, there is much more customization available. What is known as a Module in V3 is a Row in II, and each row includes both columns and modules. Settings for rows, columns, and individual modules can be all be edited.
Let us use this row – in II terminology – as an example:
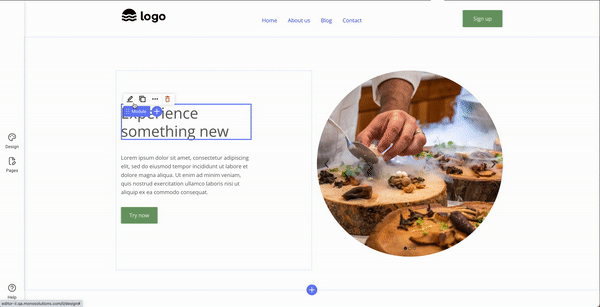
Here you can see a row with two columns. In the left column, there are three modules: Two text modules and a button module. In the right column, there is an image module. The modules can be edited to a greater extent, can easily be dragged to change the order and the individual elements can be deleted – unlike in V3.
Read more about rows, columns, and modules.
Global Data and Global Design
Users of V3 know of Global Data and Global Design; but with II, the process has been simplified for a quicker, more intuitive process when creating and updating websites.
Global data
Input SMB data in one central place. The Editor and Mono's templates (see below) are designed to automatically feed global data items directly into the website through content block modules, ensuring maximum automation and efficiency.
Global design
In just a few clicks, quickly update the entire website color scheme with global colors and update fonts throughout the entire website with global font families and sizes. As with global data, updates to global design are automatically fed to the appropriate areas on Mono templates.
Read more about Global Data and Global Design.
Design
From design skins to easily editable templates
In V3, users have over 300 D4 design skins to choose from, though this is mainly comprised of 6 different designs with different color schemes and fonts. There is no easy way to search or sort through these design skins other than manually scrolling through.

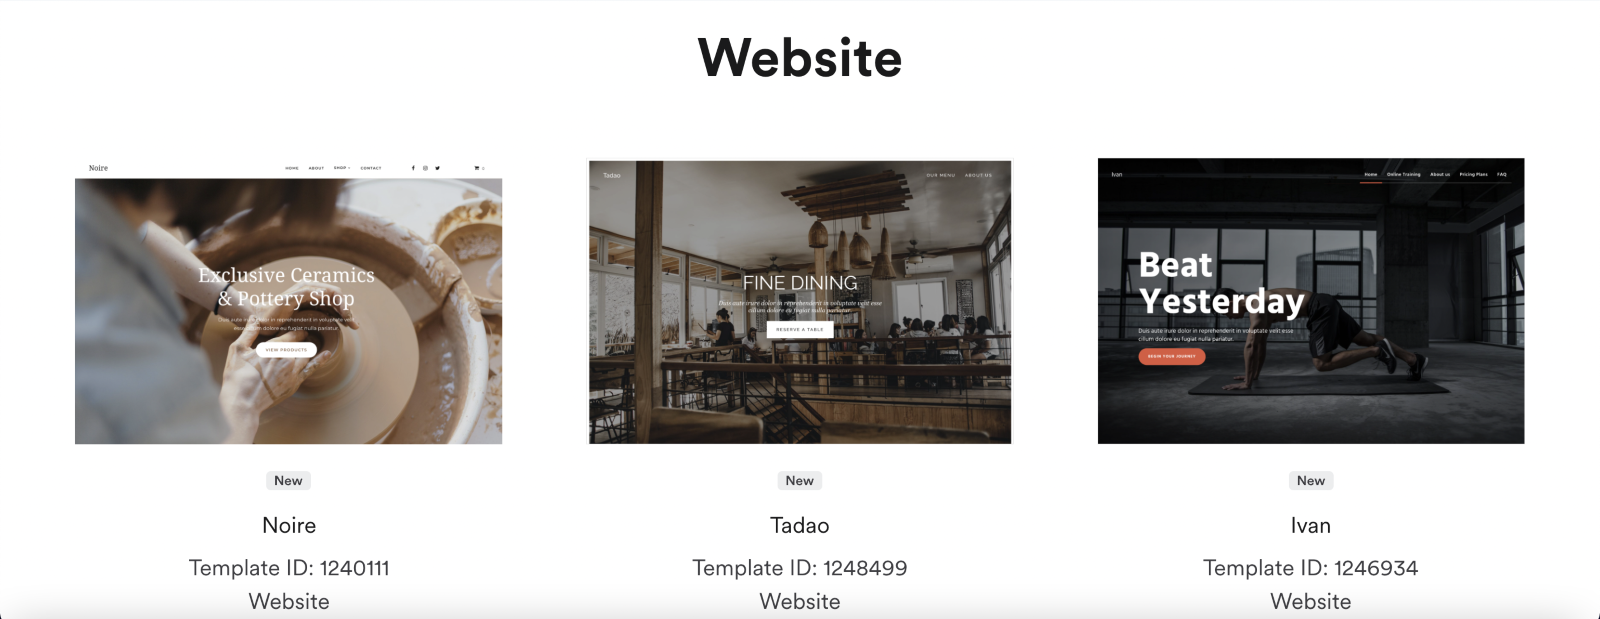
In II, users have access to more than 63 website templates and 15 landing page templates. Global templates are built by Mono and are completely free to use. To use them, simply copy the templates into your local template library in our Reseller Admin Interface (RAI) and edit them from there. The templates can be viewed on the Mono Solutions website:
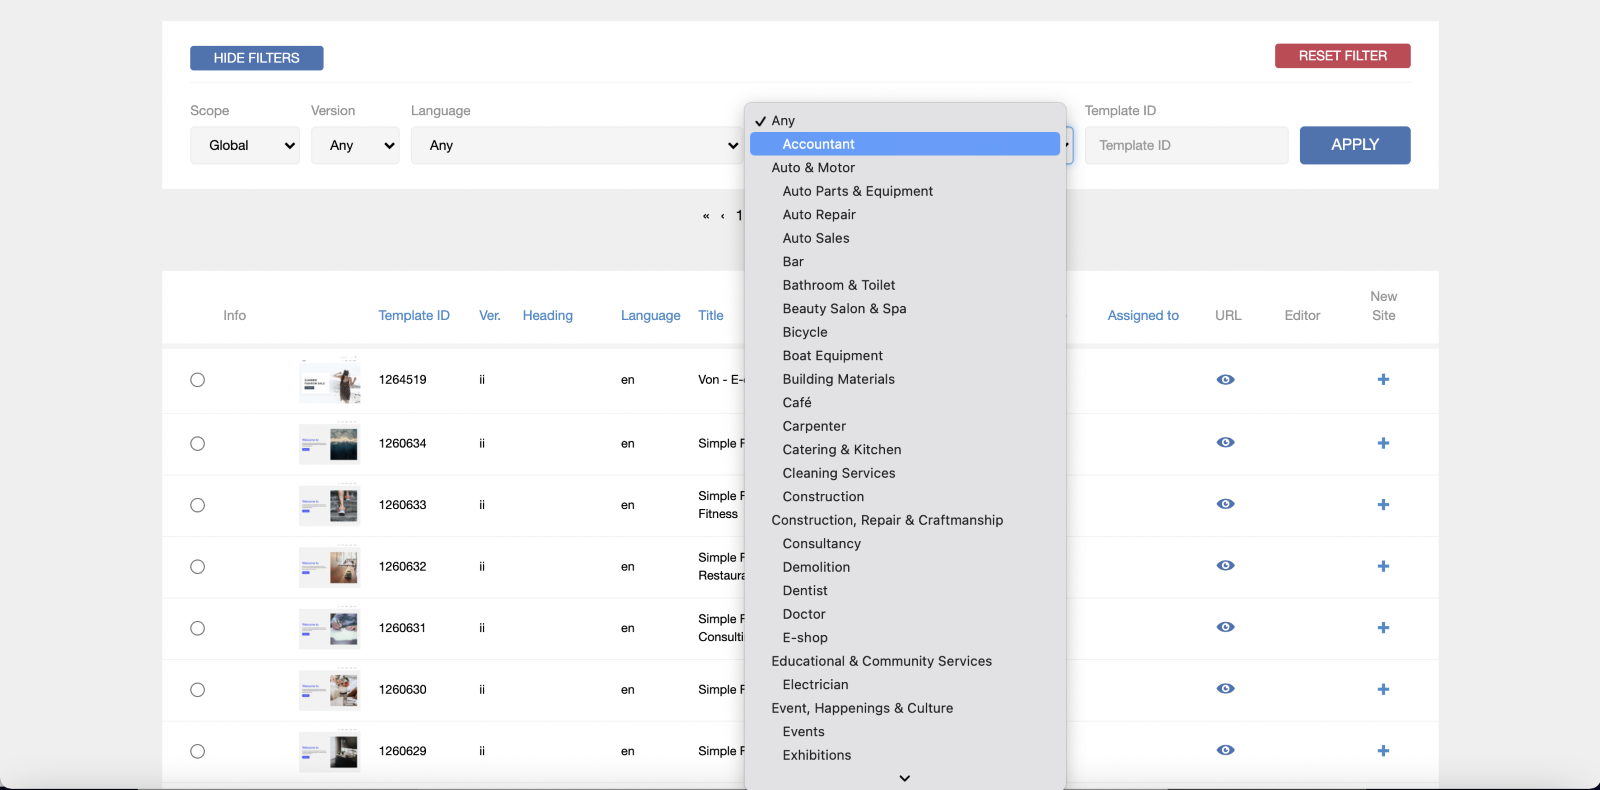
You can also view the templates in RAI, where you can filter the templates by business sector, where you can then easily preview by clicking on the Eye icon in the URL column:
Once a template has been chosen and added to a site, the fonts and colors can instantly be updated in global design to match company branding. Mono's templates are designed to automatically feed global data and design items directly into the website through content block modules, ensuring maximum automation and efficiency.
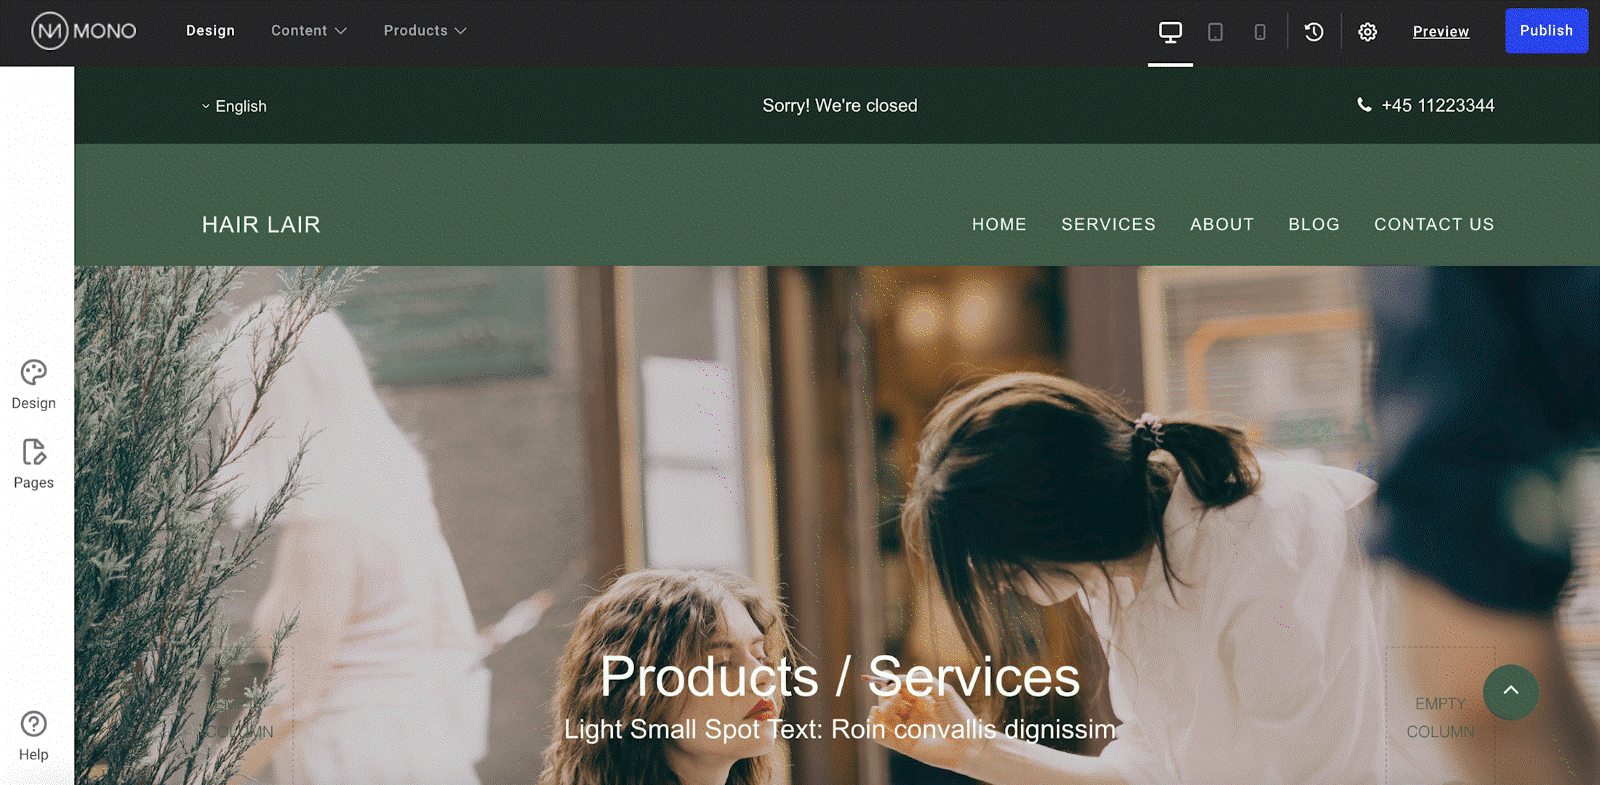
Pre-created templates and global design not only allows you as the reseller to quickly create mock-ups for clients, but also provides all users an easier, more intuitive way to make updates.
Additional template benefits:
V3 users will also see additional benefits of using the II templates. The templates provide an advanced starting point for SEO-friendly website production and have been created with modern design best practices in mind. Templates include “above the fold” call-to-actions to help SMEs convert visitors to leads and customers as well as features to help the visitor navigate and find what they need on the site including: an easy-to-navigate title menu, descriptive headlines, and layouts combining smaller paragraphs and images/illustrations. Additionally, the templates are designed for to provide a fast website load speed.
Read more about templates.
Pages, rows, and modules
Add pre-defined pages and rows to templates in one click:
To make website creation even easier, V3 users will be able in II to easily add additional pages and rows to their template, with the added content instantly match the text and color styling of the template.
Pages:
By simply clicking Add New Page, a menu appears with pre-created page layouts; including home pages, product pages, about pages, contact pages, FAQ pages, and the option to create an empty page. A preview of the page can then be seen when hovering over the page option in the menu.
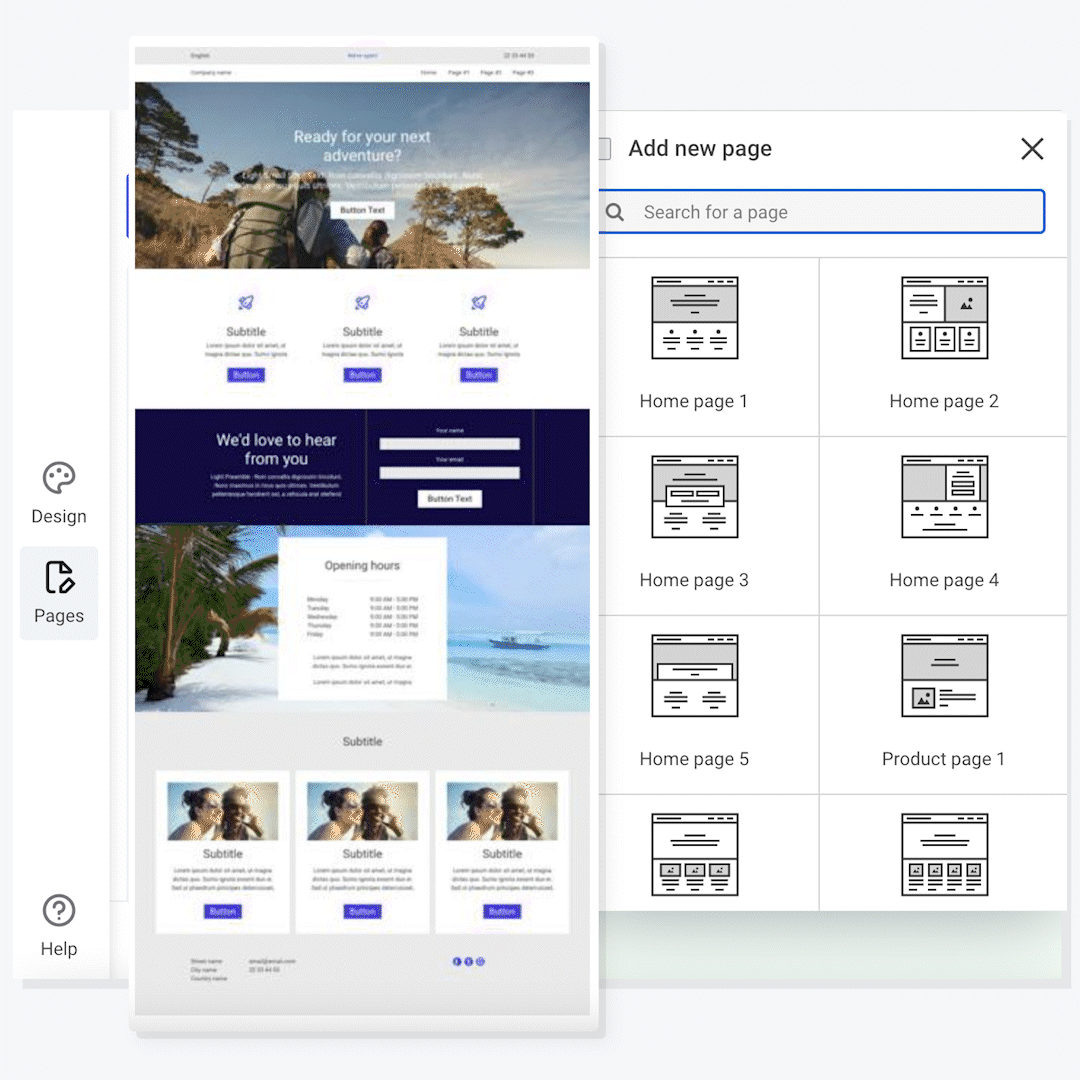
Once added to the site, the page will adapt the global design of the template.
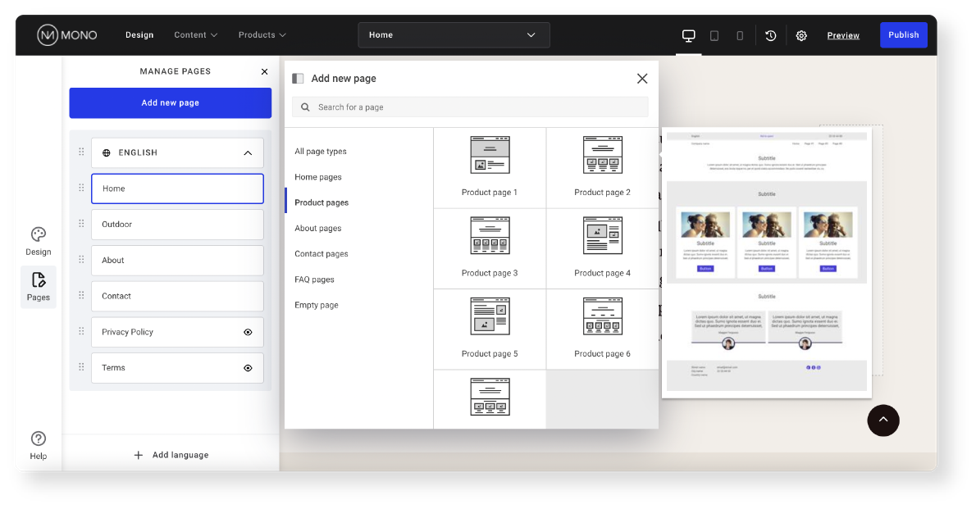
Read more about setting up and managing pages here.
Rows:
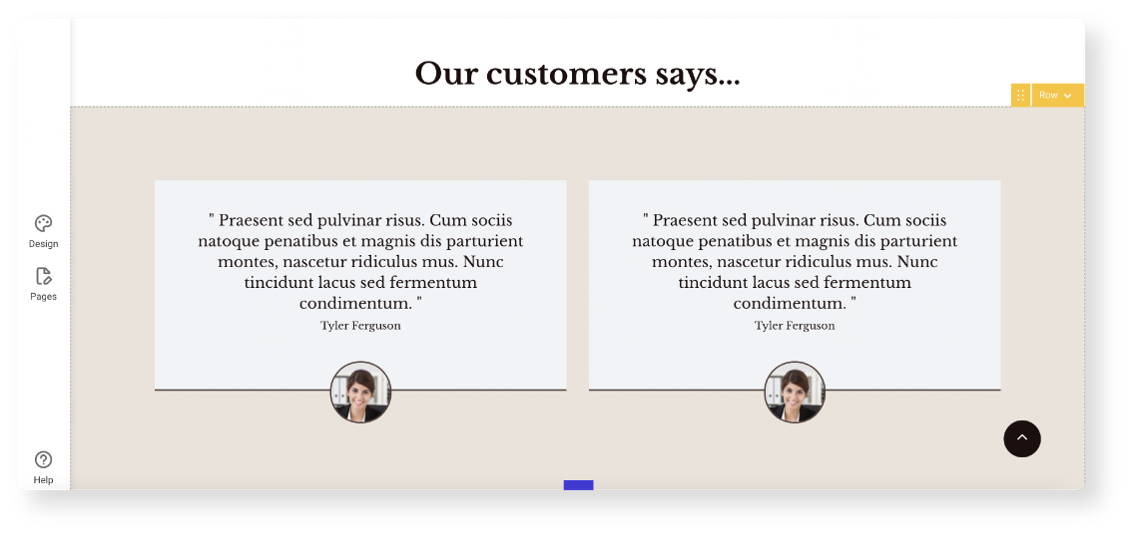
By clicking Add Row in II, a categorized and searchable menu appears with 110 predefined row options to choose from; including: text and image rows, testimonial rows, icon rows, team rows and much more. The modules, or content blocks, within the rows are grouped together based on commonly used combinations.
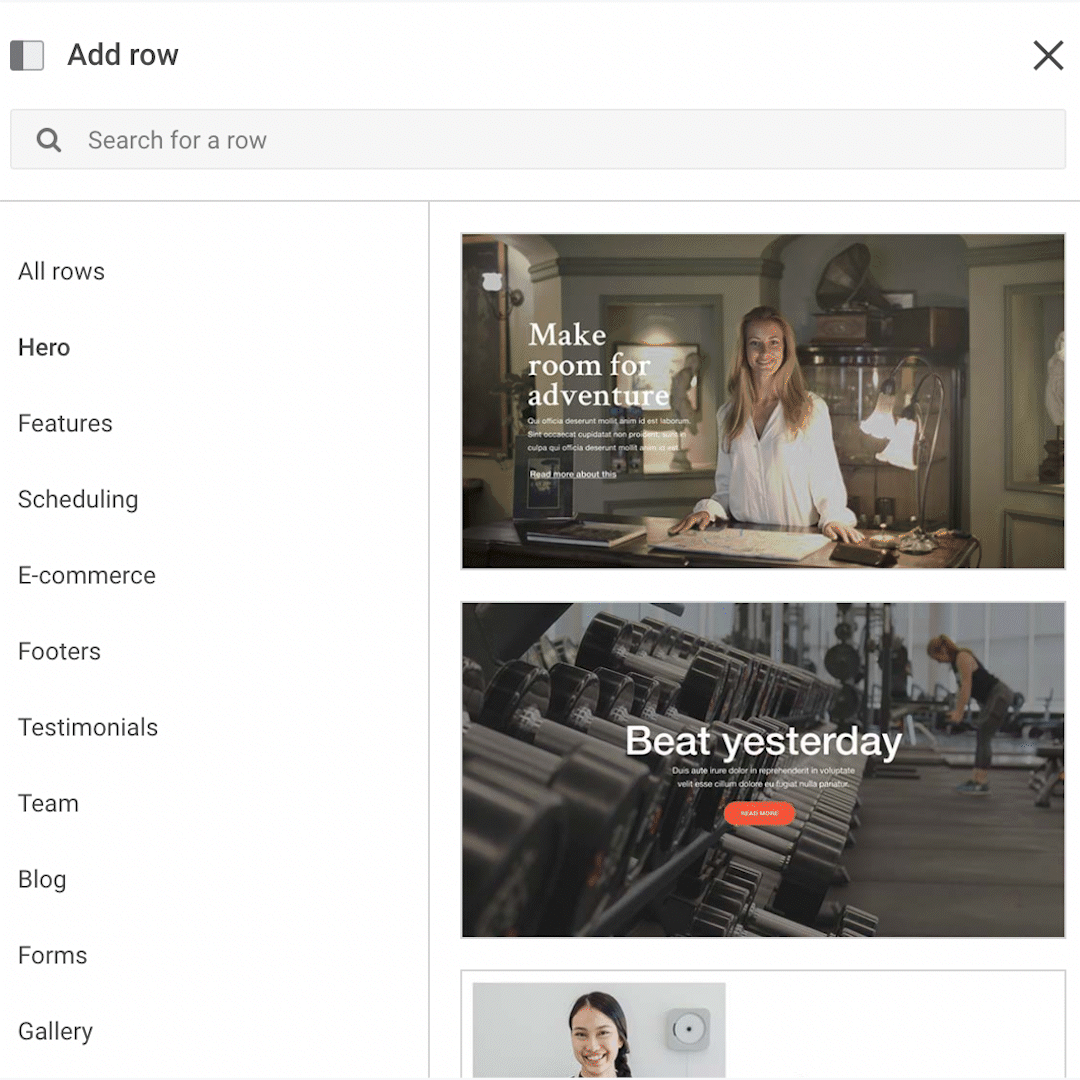
In the menu, users can see a preview of the rows, which then adapt to the global design of the template when added to the page. All rows have been created with a responsive design and are viewport (mobile, tablet, desktop) optimized.
Read more about rows.
Modules:
As mentioned above, it is important to note an important terminology update from V3 to II. In V3, modules did not distinguish between individual content blocks, columns, and rows, whereas in II modules only mean the individual content blocks.

In V3, 78 modules were available to choose from, where users could only narrow down the modules by selecting Content, Special, Full Width or E-commerce. Users could not easily search and select a module.

In II, there are 55 individual content blocks to choose from. In the module menu, users can simply use the search bar or the categorized menu to quickly find and add a module to the page.
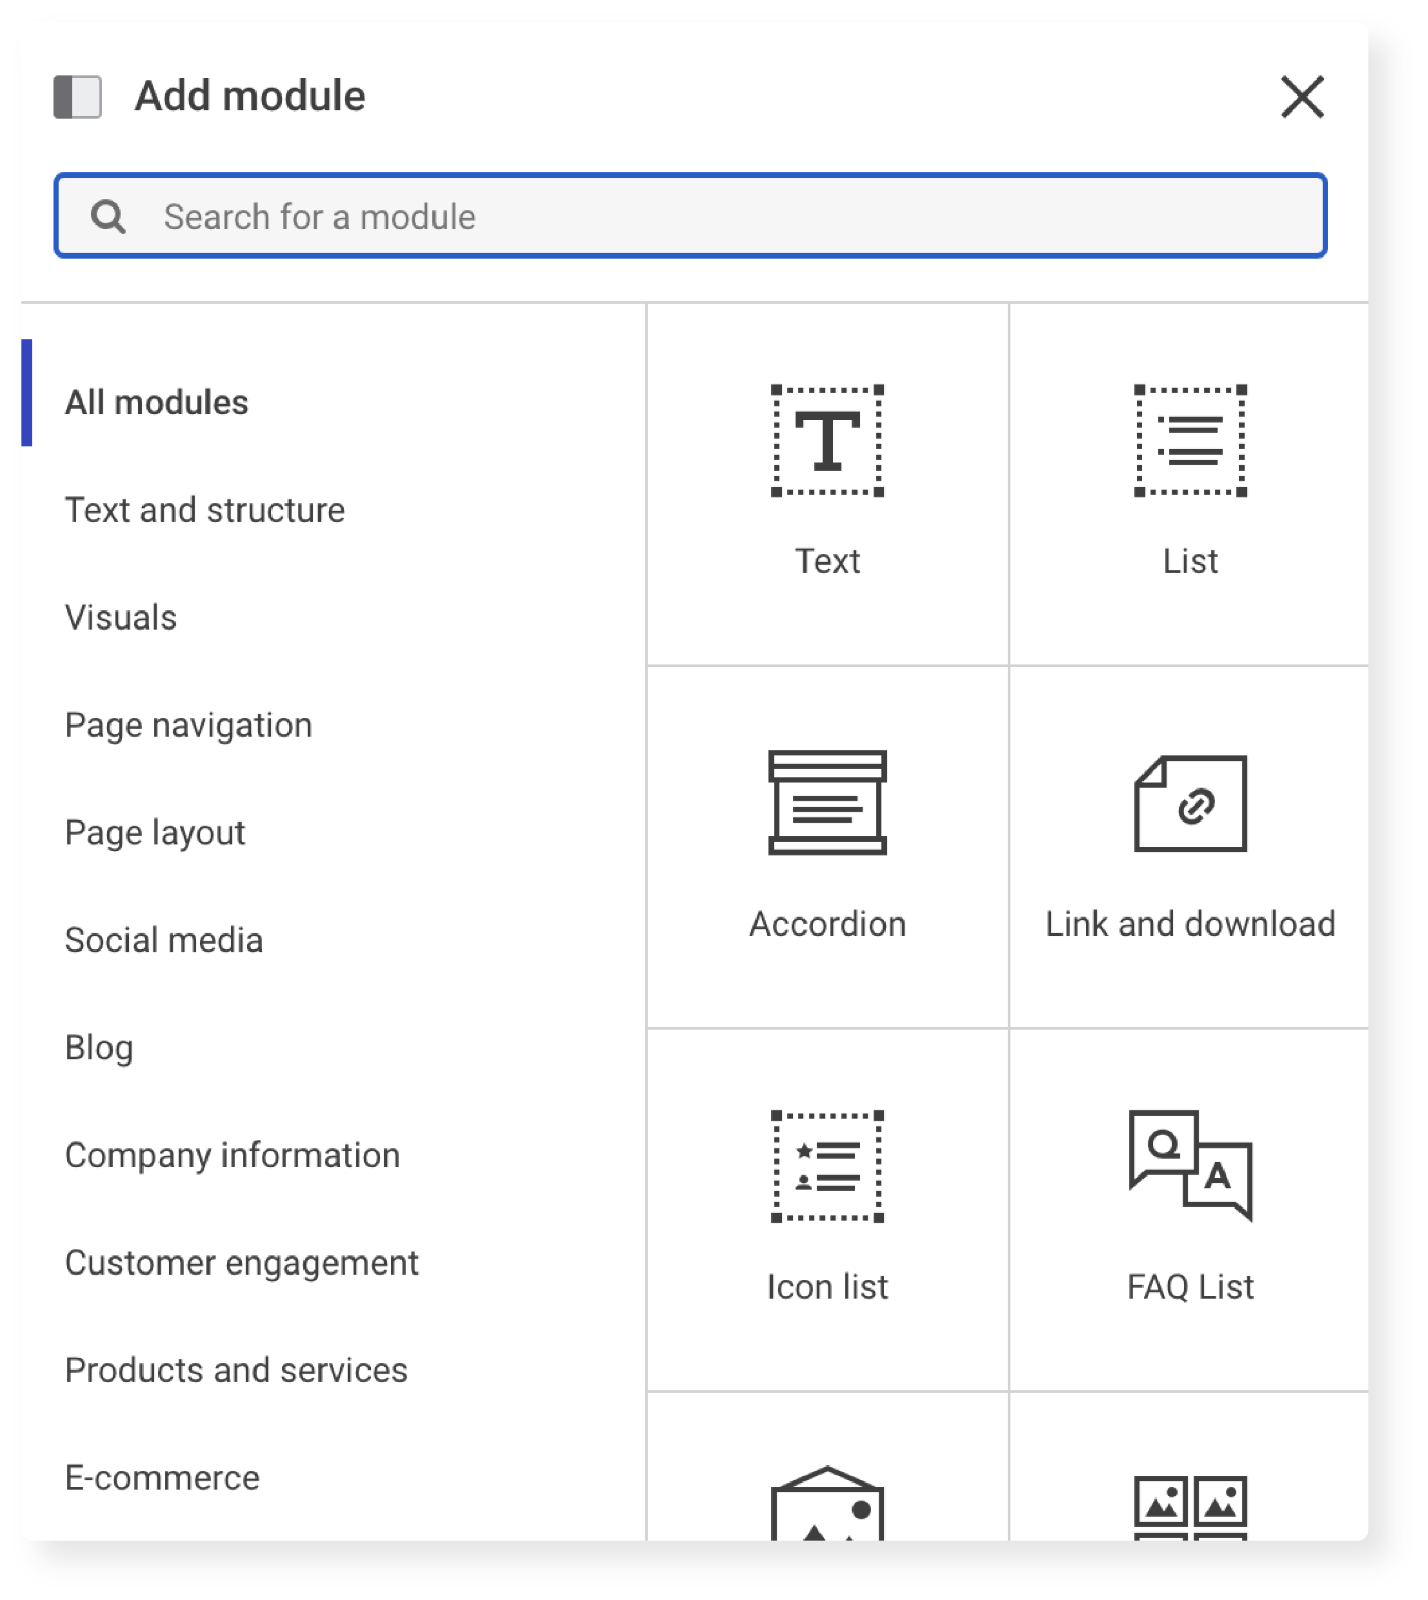
As with pages and rows, when the modules are added to the page, they automatically use the global styling of the template. However, this can be altered with local styling to make individual modules stand out – ex. Important call-to-actions.
Find more information about Modules here.
Mono Products
With II comes the possibility for SMEs to use additional trust-building and conversion-boosting products on their website.
Additional Mono Products currently include:
- Mono Blog
- Mono Cookie Consent
- Mono Customers
- Mono E-commerce+
- Mono On-site Engagements
- Mono Scheduling