In the Editor, you can add animations to any element on your website. Animated entrances can be used to create a more engaging design or help focus the visitor's attention on a specific element that you want to stand out.
How to add an animation
Hover on any row, column or module label and find the Add animation option on the dropdown.
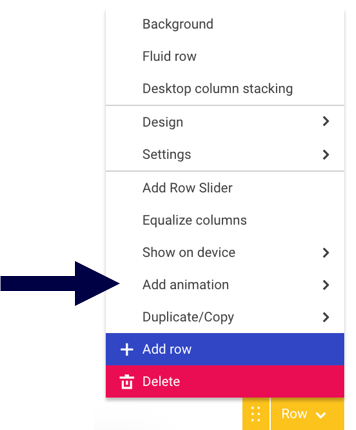
Click one of the animation types (see examples below) to add it to your element. Once added, the Editor triggers the animation once to show you what it looks like.
Types of animations
When adding an animation, you can select from the following types:
Fade in

Fade in left

Fade in right

Fade in up
Zoom in

Flip in

Bounce in
Set animation speed and delay
If you wish to add a bit of customization to your animations, you can do so by adjusting speed and delay. Find these options on any row, column or module in the Design menu > Animation.
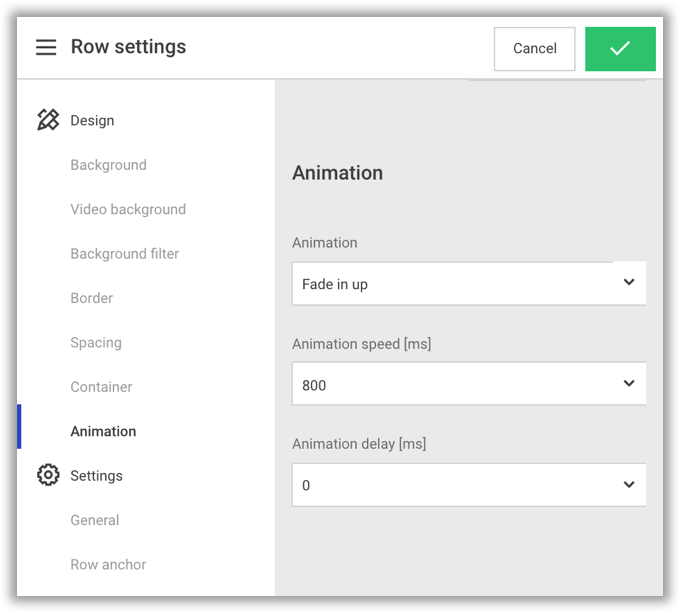
Animation speed defines how fast (in milliseconds) you want the animation to play from the moment it starts until it ends. By default, all animations are set with a speed of 800 milliseconds (0.8 seconds).
By setting an Animation delay, you can define a "gap" between the visitor viewing the element in their browser and the animation starting. By default, the delay is set to 0 milliseconds on all animations, meaning that they play instantly when the visitor views the element.